How to Build a Museum-Worthy Display for Your Vintage Board Game Collection

This post covers the practical steps needed to turn a scattered pile of vintage board games into a proper, museum-worthy display that protects the boxes, shows off the artwork, and keeps the collection organized for years to come. Whether the games date back to the 1930s or the 1980s, the right lighting, shelving, and climate control can mean the difference between a dusty closet heap and a showcase that visitors actually stop to admire.
What's the Best Way to Light a Vintage Board Game Display?
The best approach is to use cool LED strips or puck lights positioned at the front of the shelf, aimed toward the back, so the artwork gets even illumination without direct heat falling on the cardboard. (Heat is the silent enemy of old glue and paper.) Vintage game boxes often feature bold, saturated lithography—think of the deep reds on a 1963 Clue box or the bright yellow of a first-edition Risk—and those colors deserve to be seen without fading into ghosts of themselves.
Philips Hue light strips set to 3000K–3500K produce a warm white that flatters mid-century graphics without casting the harsh blue tint common in cheap daylight LEDs. That said, any light source that emits UV rays should be avoided entirely. Incandescent bulbs and unfiltered fluorescents will bleach box art over time, turning rich navy blues into washed-out grays. Track lighting from Halo or Lithonia can work if fitted with LED GU10 bulbs rated 2700K, but keep the fixtures at least three feet from the shelves to reduce intensity and heat buildup.
Here's the thing: museums typically keep display lighting under 50 lux for sensitive materials. Board game boxes are sturdier than watercolors, but they still benefit from restraint. A simple inline dimmer lets you drop the brightness during evening hours, and motion-sensor switches ensure the lights aren't burning eight hours a day for no reason. For collectors who want precision, a Dr. Meter LX1330B lux meter costs under forty dollars and takes the guesswork out of placement. If the display sits in a living room with windows, draw the blinds during peak sun—better yet, install 3M UV-blocking film on the glass.
Worth noting: directional lighting from above can create harsh shadows across raised box lids. Front lighting, sometimes called "valance lighting" in gallery circles, evens things out. The National Gallery of Art offers excellent public guidelines on preventing light damage to paper-based collections, and the same principles apply to vintage Milton Bradley and Parker Brothers boxes.
How Do You Protect Board Games from Sunlight and Humidity?
You protect them by blocking ultraviolet light, keeping relative humidity between 45% and 55%, and avoiding temperature swings that cause cardboard to expand and contract. (Basements and attics are usually the worst choices—too damp, too hot, too unpredictable.)
Direct sunlight will bleach box tops in a matter of months. UV-blocking acrylic cases from DisplayGifts or custom acrylic fabricators provide a physical barrier, though they can get pricey for a large collection. A cheaper middle ground is to apply 3M UV-blocking window film to any glass near the display. For open shelving, rotate the front-facing boxes every few months so no single game takes the brunt of ambient light. Even indirect daylight adds up over years.
Humidity control matters just as much. Cardboard absorbs moisture, which leads to warping, mold, and that musty smell that collectors dread. A ThermoPro TP50 digital hygrometer placed on the shelf gives a real-time reading for under fifteen dollars. If the room runs humid—common in Fredericton during July and August—a small Eva-dry wireless dehumidifier tucked behind the shelves pulls moisture out without noisy compressors. In dry winter months, a passive humidifier (a simple clay water reservoir) can keep the air from getting brittle. For extra insurance, toss a few silica gel packets inside the game boxes themselves, replacing them annually.
The catch? Temperature matters too. Heat accelerates the breakdown of adhesives and causes plastic game pieces to off-gas. Keep the display away from radiators, heating vents, and electronics that pump out warm air. The Smithsonian Museum Conservation Institute recommends stable environments for mixed-material collections, and vintage board games are exactly that—paper, cardboard, wood, plastic, and sometimes metal, all aging at different rates.
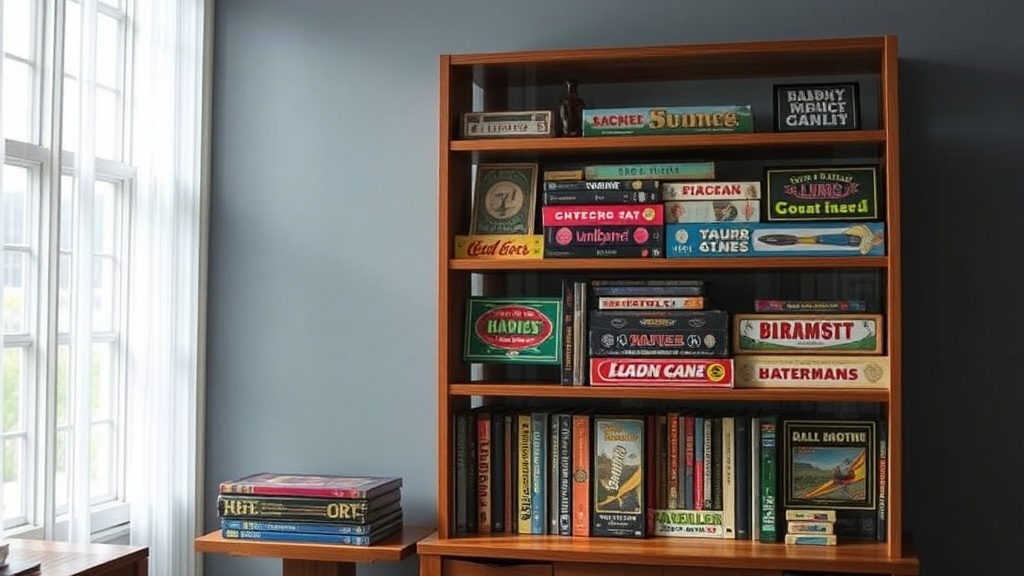
What Shelving Works Best for Large Vintage Board Game Boxes?
Cube storage with 13-inch or deeper compartments—such as the IKEA KALLAX or Sauder North Avenue lines—handles the oversized dimensions of vintage games far better than standard 10-inch bookshelves. (Nothing looks sadder than a 1965 Monopoly box hanging two inches over the edge.)
Vintage titles often come in larger formats than modern games. A 1950s Candy Land box might measure 19 by 9.5 inches, and early Strategy & Tactics wargames from Avalon Hill frequently hit 14 inches square. Standard office shelving leaves them precariously perched or forces them into tight slots that rub the corners raw. Worse, a sagging fiberboard shelf can bow under the weight of twenty solid boxes, sending the whole row sliding toward the center.
The table below compares four shelving options that collectors actually use:
| Shelving Unit | Cube/Depth | Best For | Approx. Price (CAD) |
|---|---|---|---|
| IKEA KALLAX (4x2) | 13" x 13" | Mid-size collections, modular expansion | $110 |
| Sauder North Avenue | 15" deep | Oversized 1950s–70s boxes | $180 |
| Bestar Pur | 12" deep | Smaller card games, compact spaces | $250 |
| Custom plywood built-ins | Custom | Serious collectors, exact fits | $500+ |
That said, open cube storage has one drawback: dust. If the shelf faces a high-traffic hallway, consider adding fabric bins to the lower cubes for less display-worthy items, or install thin acrylic doors on the front rows. Some collectors prefer wall-mounted floating shelves from West Elm for a rotating "featured game" display, but these work better for single-showpiece boxes than for a full collection. Whatever the choice, anchor tall units to wall studs—vintage games are heavier than paperbacks, and a toppled KALLAX makes for a heartbreaking afternoon.
Should You Store Board Games Vertically or Horizontally?
Horizontal storage is generally safer for vintage board games because it prevents box bottoms from sagging under the weight of components, though vertical stacking works if the boxes are snugly supported on both sides. (Think of it like books on a library shelf—without bookends, they'll lean, warp, and eventually split at the corners.)
Here's the thing: many vintage boxes are essentially thin cardboard trays with a printed wrap. When stored on their sides, the bottom panel takes all the pressure from loose boards, metal pieces, and thick paper manuals. Over years, that stress creates a permanent bow. Horizontal placement distributes weight more evenly, but it limits how many boxes you can access without unstacking the pile above. For that reason, serious collectors often reserve horizontal storage for the rarest titles and keep everyday plays within easy vertical reach.
For frequently played titles, vertical storage in a tight cube shelf is practical. Slide in a pair of acrylic bookends—Clear-Ad makes unobtrusive ones—or even cut custom foam inserts to prevent side-to-side shifting. If the box contains loose metal pieces (old Monopoly houses, Cootie antennae), consider bagging them in acid-free polyethylene so they don't rattle around and dent the lid. For rare or mint-condition boxes, horizontal placement on a single shelf with nothing stacked on top is the gold standard. If space is tight and stacking is unavoidable, place the heaviest games on the bottom and use a sheet of acid-free board between layers to prevent abrasion.
How Can You Add Context Without Cluttering the Display?
You can add context with small, uniform labels—printed on cream cardstock or small brass plaques—that note the publisher, release year, and a brief historical fact, keeping each label under three lines so the eye stays on the artwork. (Less really is more.)
A 1972 The Game of Life box looks great on its own, but a tiny card reading "First edition with the 'mountain' board, not the flat version" turns a shelf into a conversation. Some collectors frame original magazine advertisements from Life or Saturday Evening Post and hang them nearby. Others place vintage playing pieces—an old wooden Monopoly hotel, a metal Cootie leg—in small shadow boxes between the game shelves. QR codes linking to a brief history can work too, though they tend to age poorly and feel out of place beside 1960s graphic design.
Worth noting: museums call this "interpretive material," and the key is restraint. One framed ad per wall is enough. One label per shelf is plenty. The games themselves are the stars. If the display starts to feel like a flea-market booth, pull back. A clean arrangement with breathing room between boxes always looks more expensive than a cramped one. Rotate a "game of the month" to the center spot if you want to keep the wall dynamic without adding more stuff.
For collectors who want to research release dates and publisher histories, BoardGameGeek maintains the most comprehensive database of vintage titles available online. A quick search there can confirm whether a 1959 Scrabble box is the Selchow & Righter first edition or a later production run.
A museum-worthy display doesn't require a museum's budget. It requires attention to light, climate, spacing, and a little restraint. Start with one well-lit shelf, add a hygrometer, and build outward. The boxes have survived decades already—give them a home that ensures they'll look just as good decades from now.